
The parts

- 1CameraThe lens. Keep the cover on when you are not filming.
- 2GimbalThe motors that keep the picture steady. Never twist the head by hand.
- 3ScreenRotate it to turn the camera on and off. Tap a face to focus.
- 4JoystickPush to aim the camera. Press twice to point it straight again. Press three times to flip it to face you.
- 5RecordPress once to start, once to stop. Watch for the red dot and timer.
- 6USB-CCharging port. Plug into the power bank at every break.
The four swipes

Before every take
Tap each one as you check it.
Everyone on set is learning something. Asking the director takes ten seconds. Re-shooting a missed shot takes much longer.
How do I…
Pocket 3: turn it on or off
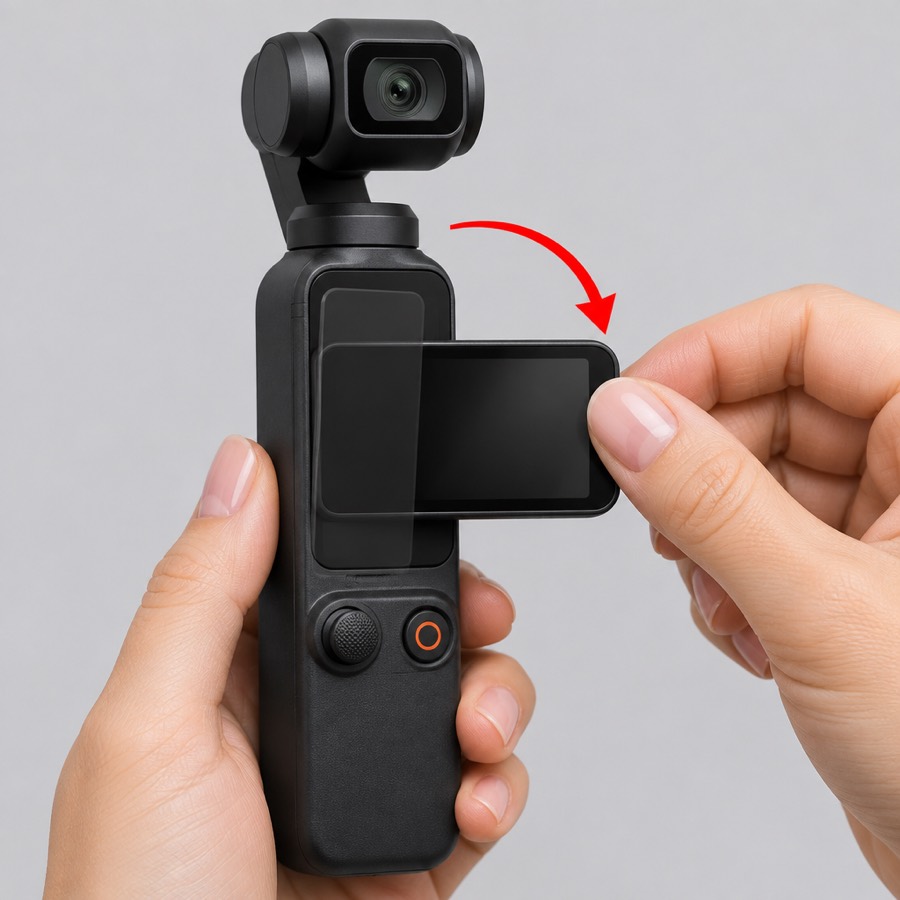
If a message or tip pops up when it starts, tap Continue (or OK) before it disappears. Then rotate the screen to turn it on. Rotate it back to turn it off. Take the cover off first.
Pocket 3: switch between vertical and horizontal
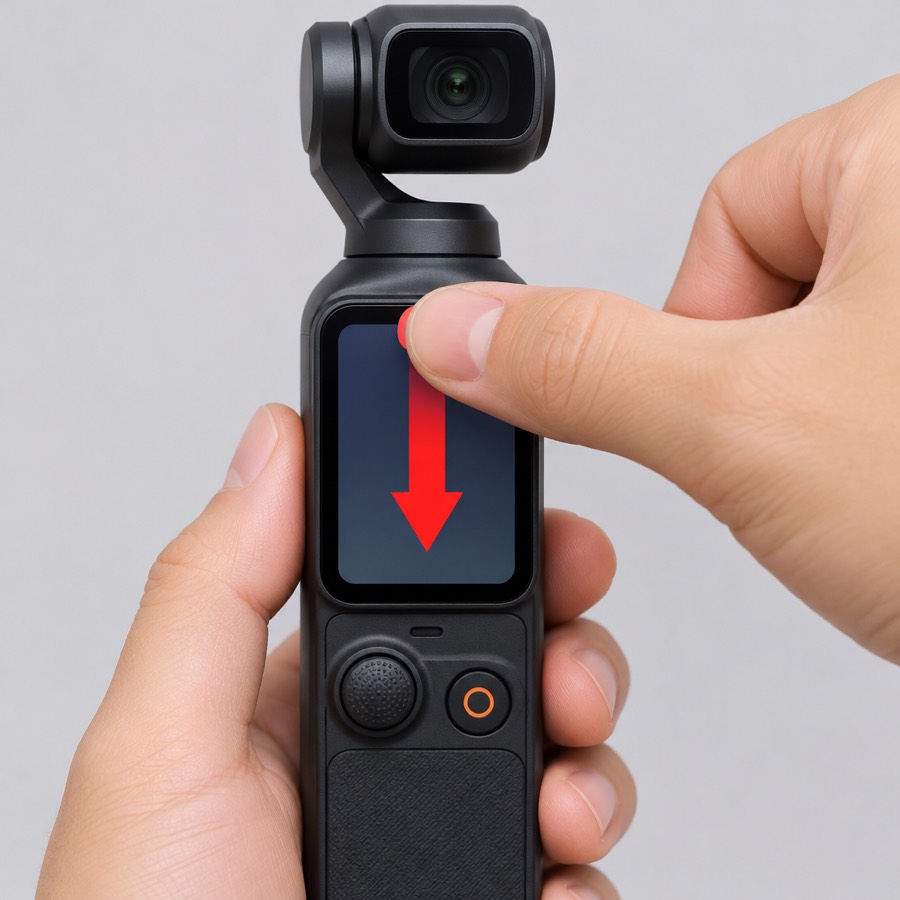
Swipe down from the top of the screen and tap the orientation tile. Tall picture means vertical, wide means horizontal. The shot list says which one each shot needs.
Pocket 3: aim the camera or straighten it
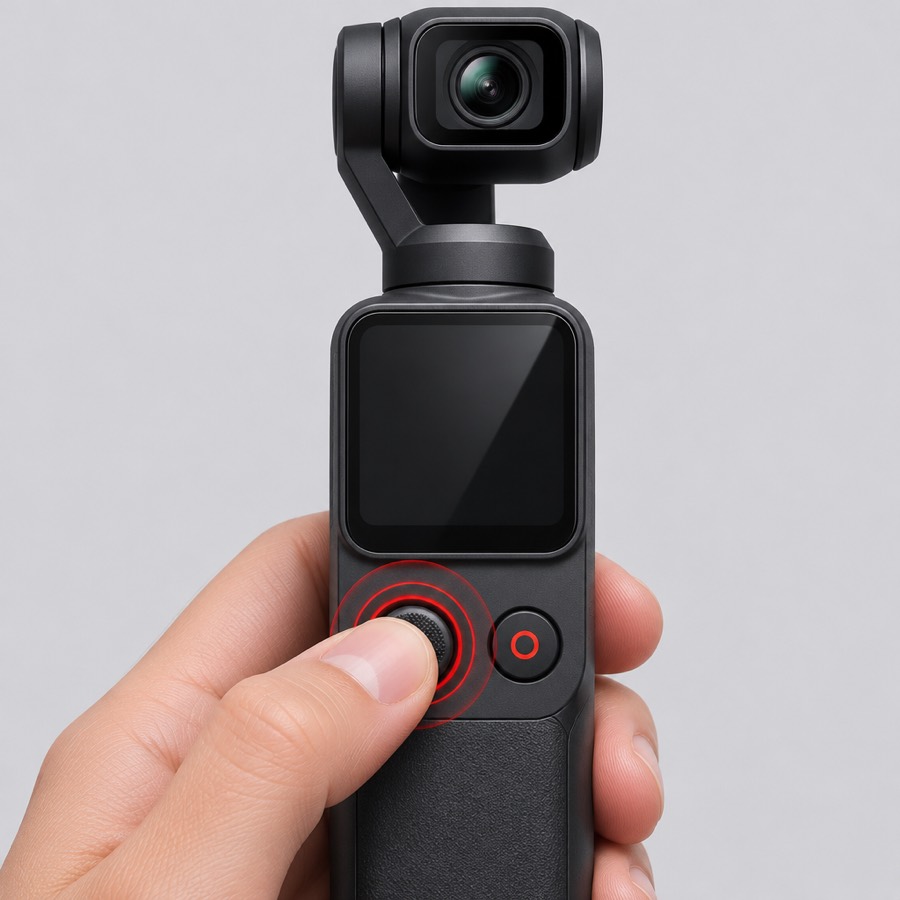
Push the joystick gently to aim the camera. Small pushes give slow moves.
Double-press the joystick to point it straight ahead again. Triple-press to flip it to face you, and triple-press again to flip it back.
Pocket 3: start and stop recording
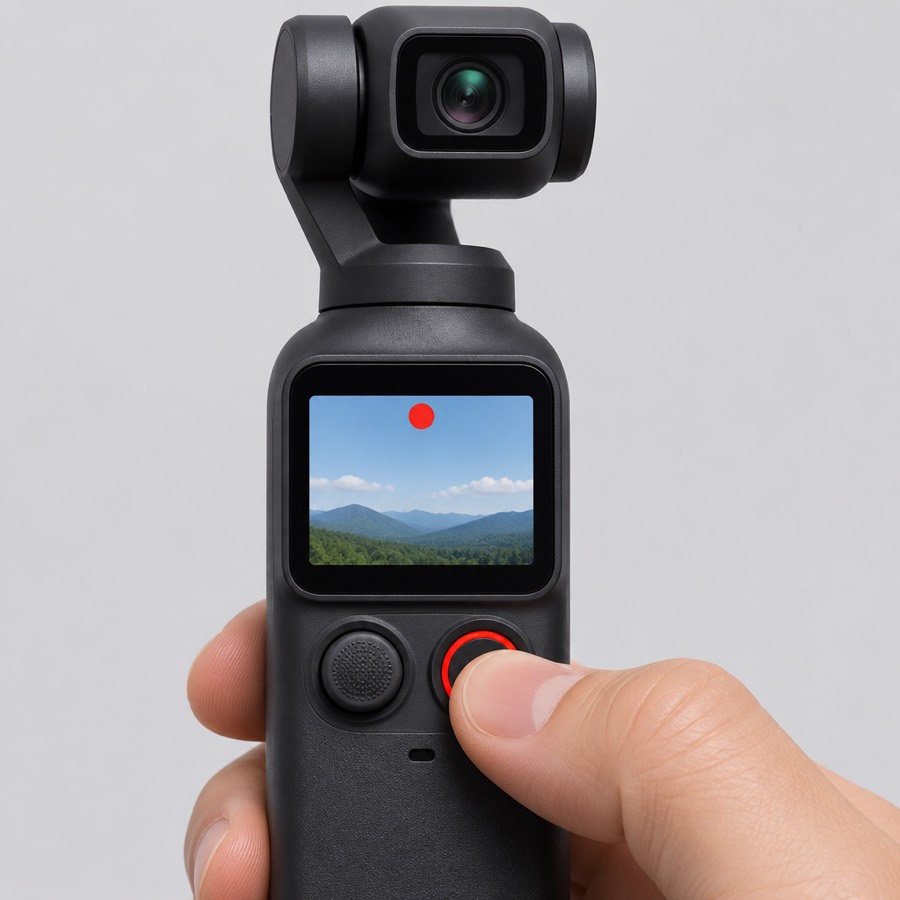
Press the record button once to start and once to stop. Look for the red dot and the running timer on screen every single time.
Pocket 3: pick the gimbal mode
Swipe down from the top, tap Gimbal mode. Follow for handheld shots. Tilt Locked on a tripod or for steady walking shots.
Pocket 3: set our camera settings
Do this before anything rolls, or load the saved custom mode (swipe down, Custom Mode) and check vertical and white balance.
Pocket 3: pair the wireless mic
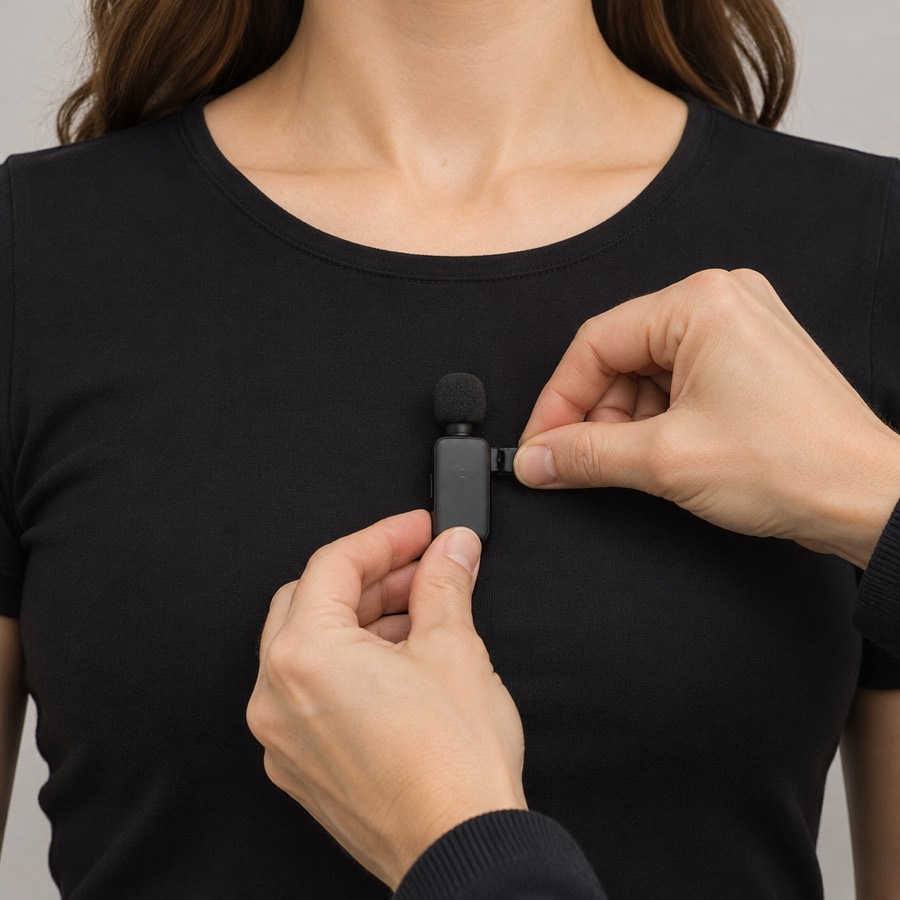
Clip the mic transmitter mid-chest on the person talking.
Pocket 3: watch a clip back
Swipe right from the left edge of the screen. Check the picture and listen to the sound. Swipe back to the live view.
Set up the yapping studio
The full 1-hour walkthrough (spot, background, light, camera, audio, test shots, car), with audio, photos and a live camera and mic test, is here: Yapping Studio test run.
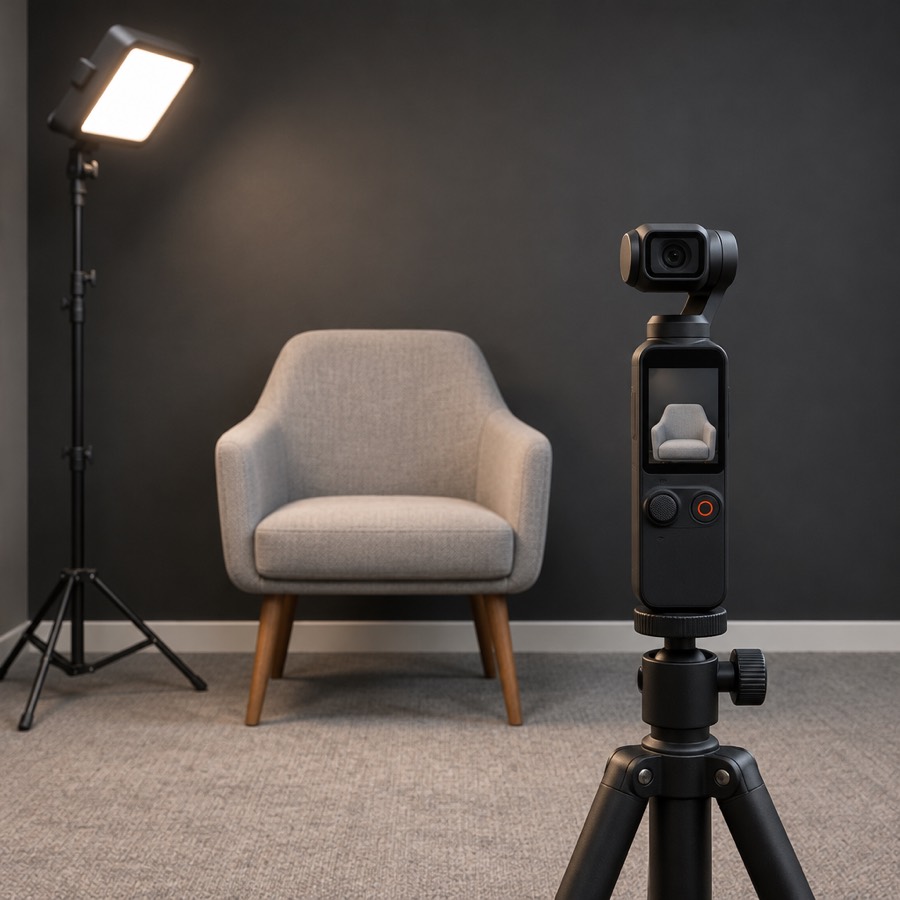
Pocket 3: get clips off the camera
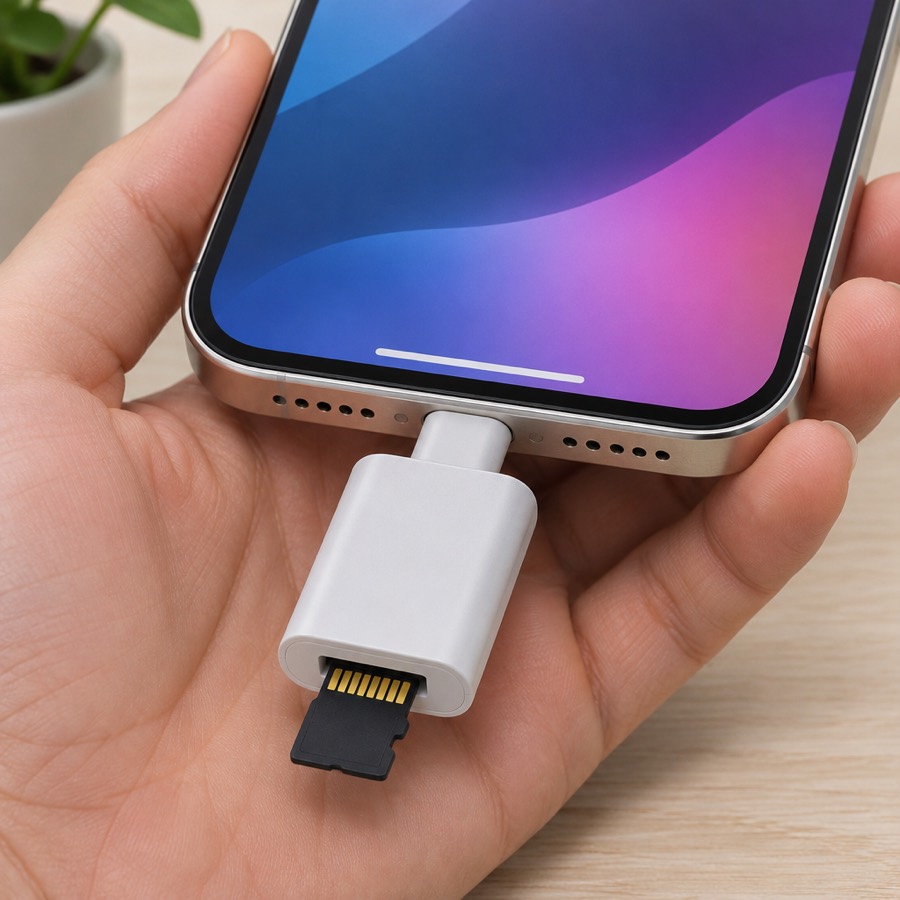
iPhone: get your phone ready
iPhone: make room (at least 10 GB free)
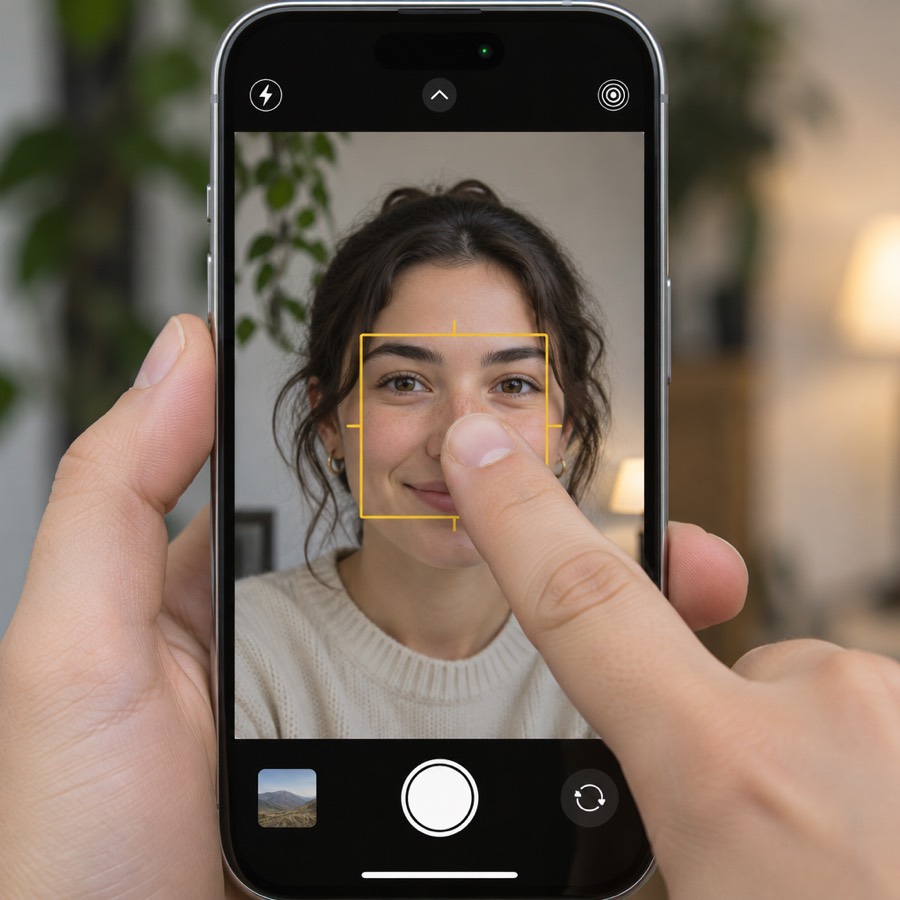
iPhone: set up the camera, tap by tap
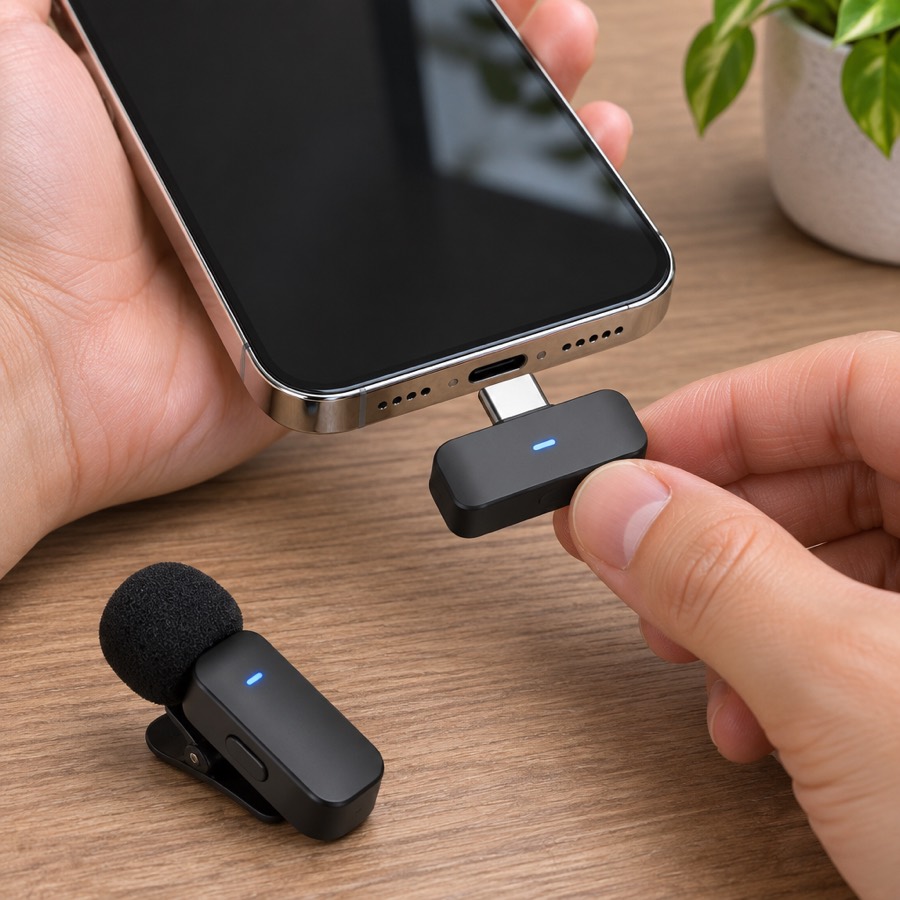
iPhone: plug in and test the clip-on mic
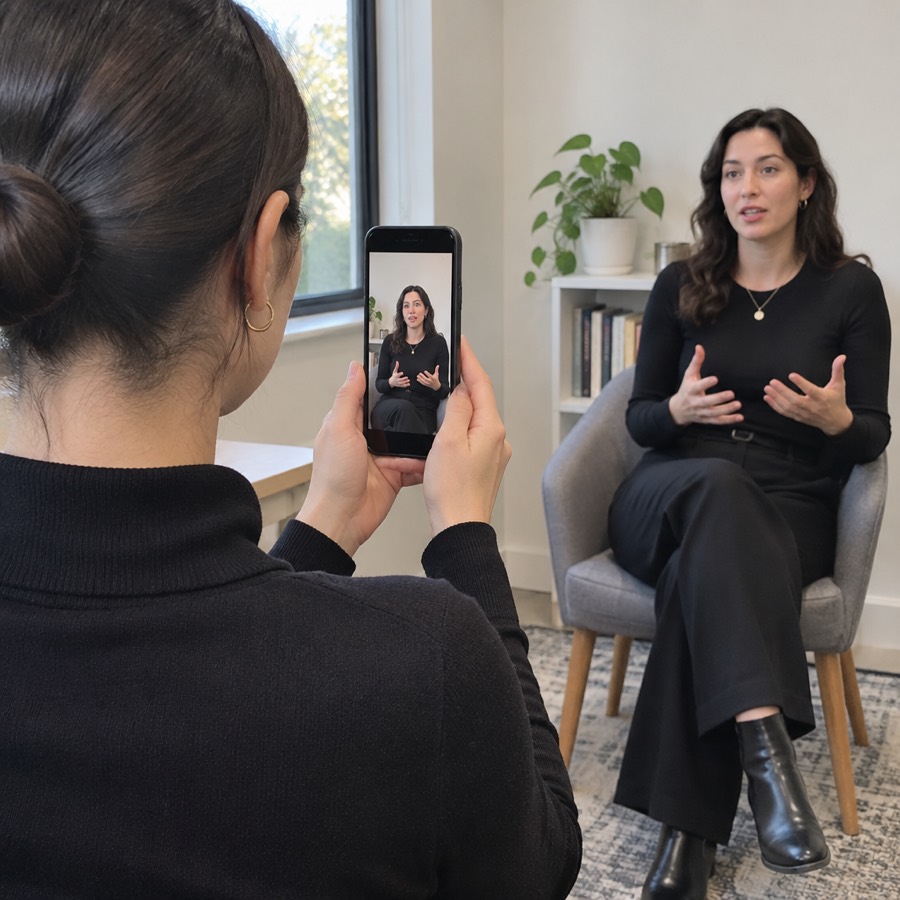
iPhone: steady shots
iPhone: get clips ready to send
Name every clip by its shot code
Upload your footage and confirm
Something's wrong
Or type it in the search box at the top.
The camera won't turn on
- Take the lens cover off and rotate the screen. Rotating the screen is the on switch.
- Still nothing? Plug it into the power bank with the USB-C cable and wait 10 minutes.
- Try again. If it still won't start, tell the director and grab the backup camera.
The battery is low or dying
- Plug it into the power bank now. It keeps recording while it charges.
- Keep the cable out of the shot: run it down the back of the tripod or handle.
- At every break, charge it, even if it still shows 50%.
There's no sound, or the sound is very quiet
- Check the mic transmitter is on and its light is solid, not blinking.
- Look at the sound meter on the camera screen while the person talks. It should move.
- Not moving? Pair the mic again: search "pair mic" for the steps.
- Roll 5 seconds, swipe right to play it back, and listen before you go on.
The mic won't connect or pair
- Turn the mic transmitter off and on again.
- On the camera: swipe down, Settings, Wireless Microphone, TX1.
- On the mic: hold the record button 3 seconds, then hold the link button 2 seconds. Solid blue means linked.
- Still blinking after two tries? Tell the director. Keep filming with the camera's own mic and note it on your upload.
Wind, hiss or echo in the sound
- Wind: put the fluffy windscreen on the mic, or turn the person's back to the wind.
- Rustling: move the mic so it isn't rubbing on clothing or jewelry. Mid-chest, clipped flat.
- Echo: move closer, add soft things (couch, rug, curtains) or film in a smaller room. Tell the director.
The picture is blurry or out of focus
- Tap the person's face on the screen once to focus on it.
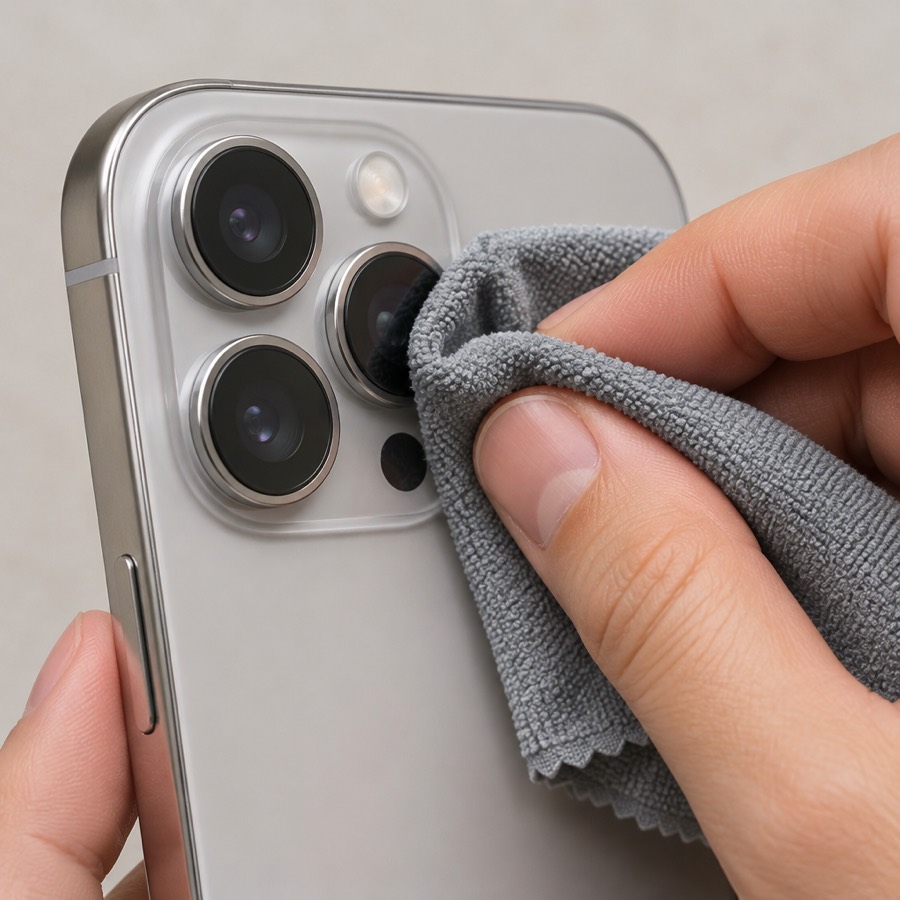
- Wipe the lens with a clean cloth. Fingerprints make everything soft.
- Too close? The camera can't focus closer than about a foot. Step back.
The picture is too dark
- Add light first: turn on the LED light or move the person toward a window or lamp.
- Then raise ISO a little: swipe left from the right edge, PRO, Exposure. Never above 1600 on a Pocket 3.
- Leave the shutter at 1/50.
The picture is too bright or white
- Lower the ISO: swipe left from the right edge, PRO, Exposure, ISO down.
- Outdoors in sun, snap the ND filter onto the lens.
- Move the person out of direct sun or turn them so the sun isn't on their face.
The picture looks gray and flat
- That's correct. We shoot in D-Log M, which looks flat on purpose. The editor brings the color back later.
- Only worry if faces are very dark or glowing white. See too dark or too bright.
Skin looks orange or blue
- White balance is wrong. Swipe left from the right edge, PRO, White Balance, M.
- Set the Kelvin number from the camera sheet. About 5600 for daylight, about 3200 for warm indoor bulbs.
- Every camera in the room should use the same number.
Dark bands or flicker roll through the picture
- That's flicker from the lights. Swipe left, PRO, Exposure, set the shutter to 1/60.
- Tell the producer you changed it.
The camera is shooting horizontal but I need vertical (or the other way)
- Swipe down from the top of the screen and tap the orientation tile.
- Tall picture = vertical. Wide picture = horizontal.
- Check the shot list: each shot says which one it needs.
The camera is pointing the wrong way or at me
- Triple-press the joystick to flip it back.
- Then double-press the joystick to point it straight ahead.
The picture is tilted, crooked or drifting
- Double-press the joystick to recenter it.
- Still crooked? Turn it off, set it on a flat surface, and turn it on without touching the camera head.
The footage is shaky
- Swipe down, Gimbal mode, Follow for handheld.
- Walk with bent knees and small steps, elbows tucked in.
- Use the tripod if the shot doesn't need to move.
I can't tell if it's recording
- Look for the red dot and the timer counting up on the screen.
- No timer? Press the record button once.
- After you stop, swipe right to check the clip is there.
I pressed record but nothing saved
- Swipe right to open playback and look for the clip.
- No clip? It never started: you probably pressed record twice. Re-shoot it now while everyone is still there.
- Tell the director the shot number.
The card is full or shows an error
- Stop and tell the director.
- Never delete clips or format the card yourself. Formatting erases everything.
- The director swaps in a spare card.
It says it's too hot
- Stop recording, turn it off, keep it in the shade for 5 minutes.
- Tell the director so the shot list can wait.
- Don't leave it in the sun or a hot car between shots.
The settings are wrong or someone changed them
- Swipe down, Custom Mode, and load the saved RS mode.
- Check orientation and white balance after loading it.
- Or search "settings" and follow the steps one by one.
The tripod won't hold the camera steady
- Spread the legs all the way and push them into the floor.
- Tighten the mount until the camera doesn't wiggle.
- Set gimbal mode to Tilt Locked.
The upload is stuck or failing
- Stay on the upload page with your phone unlocked. Leaving the page can stop it.
- Switch to Wi-Fi if you can. Big clips take a while on cell data.
- Failed? Tap upload again for that clip. The ones already done stay done.
- Still stuck after 15 minutes? Text the director. Keep the card safe; don't format it.
My phone is out of space for uploads
- Upload straight from the card when you can, one shot at a time, and delete the phone copy only after the dashboard shows it's done.
- Tell the director if you can't upload tonight. Keep the card safe.
I don't know which shot code to pick
- Open the shoot day on your dashboard. Each shot on the list has its code.
- Pick the code of the shot you filmed, then upload that clip to it.
- Not sure? Pick your best guess and write a note. The editor can fix it.
Someone walked into the shot or a phone rang
- Let it finish if the moment is good, then do another take.
- Call it out to the director so the take gets marked.
- Get two good takes of every shot.
Someone asks for my number or socials
- Say no politely: "Everything goes through RealityShow.com."
- Don't take their number either. Tell the director it happened.
Someone asks about money, prices or the show
- Say: "That goes through RealityShow.com."
- Keep working on the shot in front of you.
I'm running late or can't make my shift
- Text the director right away with your arrival time.
- Can't make it at all? Tell us as early as you can so we can call your backup.
Something broke or went missing
- Tell the director right away. Nobody gets in trouble for reporting it, only for hiding it.
- Take a photo of the damage.
I'm stuck and nothing here helps
- Text the director a photo of the camera screen and one line on what you were trying to do.
- Asking takes ten seconds. Re-shooting a missed shot takes much longer.
iPhone: No sound from the clip-on mic
- Check the transmitter is on and its light shows it's linked to the receiver.
- Unplug the receiver, close the Camera app, plug the receiver back in, then reopen Camera.
- Roll 5 seconds and play it back with the volume up. A close, clear voice means it's working. Far away and echoey means the phone is still using its own mic.
- Still no clip-on sound? Tell the director, move the phone as close to the person as the shot allows, and note it on your upload.
iPhone: The mic receiver isn't recognized
- Check the plug fits: Lightning on iPhone 14, USB-C on iPhone 15 and newer. Use the adapter from the kit if it doesn't.
- Take the case off if it stops the plug going all the way in.
- If the iPhone asks whether to allow the accessory to connect, tap Allow.
- Charge the receiver for 10 minutes, then plug it in before opening the Camera app.
- Still nothing? Tell the director. We can send you a different kit.
iPhone: Storage full in the middle of a shoot
- Stop and tell the director. Don't delete clips from today.
- Delete apps or old videos you don't need from before today. Settings > General > iPhone Storage shows what's taking space.
- If the dashboard is open and you have Wi-Fi, upload the shots already filmed. Delete today's clips only after we confirm we have them.
- Before your next shift, clear space so you start with at least 10 GB (search "make room" for the steps).
iPhone: A call or notification interrupted a recording
- Check the clip in Photos. If it stopped early, redo the take while everyone is still there.
- Turn on Do Not Disturb: swipe down from the top-right, Focus, Do Not Disturb.
- If nobody needs to reach this phone during takes, turn on Airplane Mode. Turn it off again before you upload.
- Tell the director the shot number.
iPhone: The phone is too hot
- Stop recording and get the phone out of the sun.
- Take off the case and let it cool for 5 to 10 minutes. Don't put it in a fridge or freezer.
- Unplug the charger while it cools.
- Tell the director so the shot list can wait. Keep the phone in the shade between shots.
iPhone: The brightness keeps changing
- Touch and hold the person's face until the yellow AE/AF LOCK label shows.
- Drag the sun icon next to the box up or down until the face looks right.
- Don't tap the screen again during the take. A tap unlocks it.
iPhone: The focus keeps hunting or the picture is soft
- Touch and hold the face until AE/AF LOCK shows. That holds the focus.
- Wipe the lens with a microfiber cloth.
- Check you're in Video mode, not Cinematic.
- Too close? Step back a little and lock focus again.
iPhone: The picture is on the wrong lens or zoomed
- Tap 1x above the shutter button.
- Don't pinch the screen during a take. Walk closer instead.
- If the picture looks cropped while walking, Action mode is on. Turn it off unless the shot calls for walking.
iPhone: The clip looks too bright, contrasty or HDR
- Go to Settings > Camera > Record Video and turn off HDR Video if your phone shows it.
- Check Formats is set to High Efficiency.
- Send the clips you already filmed as they are. Don't edit them. Tell the director they were filmed in HDR.
iPhone: The upload from Photos came out small or blurry
- Upload that clip again from Files instead of Photo Library.
- In Photos, select the clips, Share > Save to Files, and save them in a folder named after the shoot day.
- In the dashboard, tap upload and choose the files option (Choose File or Browse), then your folder.
iPhone: The battery is dying
- Plug into your power bank now. You can keep filming while it charges.
- Run the cable down the back of the tripod so it stays out of the shot.
- Turn on Low Power Mode in Control Center between takes, and turn down screen brightness.
- Charge at every break, even at 50%.
iPhone: The recording stopped by itself
- Check storage: Settings > General > iPhone Storage. Full storage stops recording.
- Check the phone isn't hot. Heat can stop recording.
- Check the battery. Plug into the power bank.
- Check Do Not Disturb or Airplane Mode is on, so a call can't end the take.
- Redo the take and tell the director the shot number.
Two of us are filming: who does what?
- The lead (we tell you who) splits the shot list before call time.
- Camera A takes the main shot. Camera B takes close-ups, reactions, details and cutaways from another angle.
- Same settings on both. Stay on the same side of the action.
- Both press record, then one clap in view of both cameras.
- Only the lead talks to the people on camera. If you disagree, the lead decides; note it on your upload.
iPhone: make room (at least 10 GB free)
- Open Settings, then General, then iPhone Storage. Wait for the bar to load: it shows how much is free.
- Try the suggestions at the top, like Offload Unused Apps or Review Large Attachments.
- Offload or delete big apps you won't use today, like games. Offloading keeps your data, and you can reinstall later.
- In Photos, delete long videos you already have backed up. Then open Albums, Recently Deleted, and delete them there too, or the space doesn't come back.
- If you use iCloud Photos: Settings, your name, iCloud, Photos, then turn on Optimize iPhone Storage.
- Messages: in Settings, open Messages (under Apps on newer iOS) and set Keep Messages to 1 Year to clear old attachments.
- Check iPhone Storage again: at least 10 GB free. Charge to 100% while you're at it.
- After the shoot, once we confirm your upload, delete those clips and empty Recently Deleted again.